Vue CLI 3 x Atomic Design × Storybookを使ったコンポーネント開発を試す【環境構築編】
はじめに
先日「Atomic Design ~堅牢で使いやすいUIを効率良く設計する」を読みました。

Atomic Design ~堅牢で使いやすいUIを効率良く設計する
- 作者: 五藤佑典
- 出版社/メーカー: 技術評論社
- 発売日: 2018/04/25
- メディア: 単行本(ソフトカバー)
- この商品を含むブログ (1件) を見る
こちらの本では、Atomic Designの考え方だけでなく、ReactやStorybookを使った具体的な実装方法まで詳しく解説されています。
早速試してみたい!と思い、せっかくなのでVue.jsで試してみました。
まずは環境構築から始めます。
本当はComponent作成時のTipsについてをメインに書きたかったのですが、思ってたより長くなってしまったので分割して更新していきまます…。
- はじめに
- Atomic Designとは
- Vue CLI 3とは
- Storybook
- 環境
- Vue CLI 3のインストール
- Vue.jsのプロジェクト作成と実行
- 新しいGitHubのリポジトリを作成する
- gitへのfirst push
- プロジェクトフォルダー内でNode.jsのバージョンを固定
- Storybookのインストール
- ESLint + Prettierの自動整形の設定をする[2018.11.7追記]
Atomic Designとは
Atomic Designについてはここでは割愛します。
素敵な記事がすでにたくさんあるのでそちらを参照してください。
Vue CLI 3とは
Vue CLI 3を使用すれば、webpackやらbabelやらの依存モジュールを個別にセットアップする必要がなく、簡単に本格的なVue.jsの開発を始めることができます。
ReactでいうCreate React Appみたいなものでしょうか。
今年2018年8月にアップデートされ、さらに強力なプラグインシステムとなりました。
Storybook
Storybookとは、UIコンポーネントのショーケースを作成できるツールです。
いわゆるスタイルガイドジェネレーターですね。
Vue.jsとの親和性が高く、Vue.jsで開発したコンポーネントを直接呼び出して、簡単にスタイルガイドをビルドできます。
類似ツールPattern Lab
Atomic Designの提唱者であるBrad Frost氏のサイトではPattern Labが紹介されています。
こちらもスタイルガイドジェネレーターとなりますが、手動でsourceフォルダー配下にコーディングしたファイルを設置した上でビルドが必要です。
Vue.jsと連携するにはプラグインを入れないとだめそう、且つ、Vue.jsとPattern Labの連携方法については情報が少ないのでStorybookをオススメします。
環境
以下の前提で進めていきます。
Vue CLIはNode.js 8.11.0以降を推奨しています。
Node Version Requirement Vue CLI requires Node.js version 8.9 or above (8.11.0+ recommended). You can manage multiple versions of Node on the same machine with nvm or nvm-windows.
Quote source:Installation | Vue CLI 3
nodenvのセットアップについては以下の記事にまとめています。
Vue CLI 3のインストール
公式の手順にしたがって@vue/cliをインストールします。
$ npm istall -g @vue/cli
インストールが成功したか確認します。
$ vue
-bash: vue: command not found
が、vue: command not found となっています。
vue: command not foundの解消
nodenvを使っているせいかわかりませんが、現在使っているNode.jsのbinにパスが通ってないようです。
参考:
- グローバルにインストールしたnode moduleがnot foundになる時の対処 - Qiita
- node.js - Global Node modules not installing correctly. Command not found - Stack Overflow
上記の記事を参考に、npm bin -gを$PATHに追加します。
$ npm ls -g --depth=0
/Users/hoge/.nodenv/versions/10.13.0/lib
├── @vue/cli@3.1.0
└── npm@6.4.1

$npm root -g
/Users/hoge/.nodenv/versions/10.13.0/lib/node_modules
$ls /Users/yoshie/.nodenv/versions/10.13.0/lib/node_modules
@vue    npm
$npm bin -g
/Users/hoge/.nodenv/versions/10.13.0/bin
$ls /Users/hoge/.nodenv/versions/10.13.0/bin
node    npm    npx    vue
$echo 'export PATH=$PATH:`npm bin -g`' >> ~/.bash_profile
$source ~/.bash_profile
vue --version
3.0.5
Vue.jsのプロジェクト作成と実行
$ cd ~/works/ # プロジェクトを設置したい任意のフォルダに移動
$ vue create vue-cli-sample
対話形式で、使用する機能を選択します。
今回は以下のように選択しました。
Vue CLI v3.1.0
? Please pick a preset: Manually select features
? Check the features needed for your project: Babel, Vuex, CSS Pre-processors, Linter
? Pick a CSS pre-processor (PostCSS, Autoprefixer and CSS Modules are supported by default): Sass/SCSS
? Pick a linter / formatter config: Prettier
? Pick additional lint features: Lint on save
? Where do you prefer placing config for Babel, PostCSS, ESLint, etc.? In dedicated config files
? Save this as a preset for future projects? (y/N) N
- BabelとVuexを使う
- CSSプリプロセッサはSass/SCSS
- ESLint + Prettierによるコードの自動整形を保存時に行う
- Babel, PostCSS, ESLint, などの設定は、package.jsonではなく固有のファイルで管理する
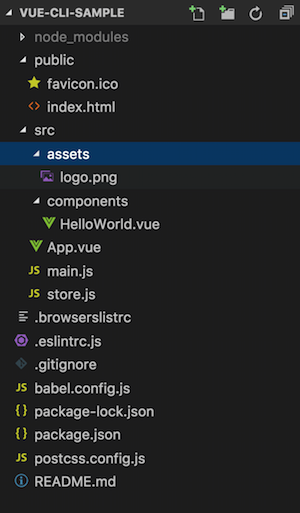
プロジェクトの作成が完了すると、以下の通り、必要なファイルがセットアップされた状態になります。

一度、以下のコマンドでビルドしてみます。
$ npm run serve
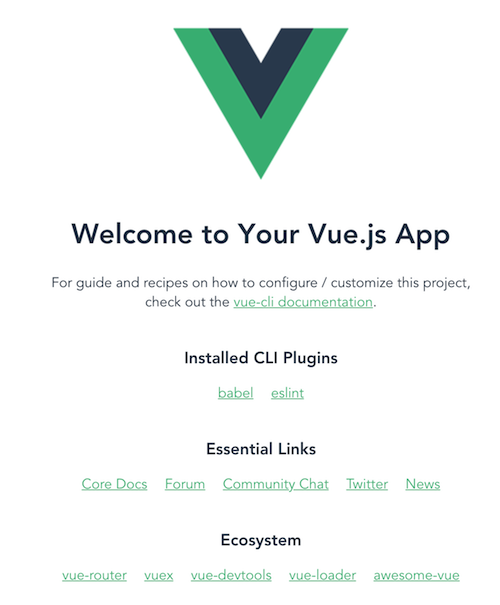
コンソールに表示されたURL http://localhost:8080/ などをブラウザで開くと、素敵なページが仕上がってます。

新しいGitHubのリポジトリを作成する
公式のヘルプを参考に、GitHubで新しいリポジトリも作っておきます。
Vue CLI 3で作成したプロジェクトではあらかじめgitの初期設定がされており、自動で.gitignore と README も作成されています。
よってGitHubでのリポジトリ作成時にこれらのファイルの作成は不要となります。
リポジトリ作成時の設定:
Repository name:vue-cli-sample(任意)Initialize this repository with a README: noAdd .gitignore:NoneAdd a license:任意
gitへのfirst push
作成したリポジトリのclone用URLを使ってリモートリポジトリの追加とpushを行います。
vue createで作成されたプロジェクトファイルはすでにすべてのファイルがcommitされているので、pushするだけでOKです。
$ git remote add origin git@github.com:empitsu/vue-cli-sample.git
$ git push -u origin master
push時にエラーが出た場合
もし、GitHubで新しいリポジトリを作成する際にREADMEや.gitignoreを作っていたらpush時にエラーが発生します。
$ git push -u origin master
To github.com:empitsu/vue-cli-sample.git
 ! [rejected]        master -> master (fetch first)
error: failed to push some refs to 'git@github.com:empitsu/vue-cli-sample.git'
hint: Updates were rejected because the remote contains work that you do
hint: not have locally. This is usually caused by another repository pushing
hint: to the same ref. You may want to first integrate the remote changes
hint: (e.g., 'git pull ...') before pushing again.
hint: See the 'Note about fast-forwards' in 'git push --help' for details.
まずはgit pullしてみる
hint にあるようにgit pullをしてみます。
$ git pull
There is no tracking information for the current branch.
Please specify which branch you want to merge with.
See git-pull(1) for details.

    git pull <remote> <branch>

If you wish to set tracking information for this branch you can do so with:

    git branch --set-upstream-to=origin/<branch> master
--set-upstream-toを使ってリモートブランチの紐付け
リモートブランチを指定しろと怒られるので、git branch --set-upstream-to を使ってリモートブランチとローカルブランチの紐付けを行います。
$ git branch --set-upstream-to=origin/master master
Branch master set up to track remote branch master from origin.
$ git pull
fatal: refusing to merge unrelated histories
が、fatal: refusing to merge unrelated histories となってしまいます。
--allow-unrelated-historiesを使ってmerge
無関係なヒストリを持つ2つのブランチをマージするために、--allow-unrelated-histories を指定します。
参考:初めてGitHubリポジトリにpushしたらrejectedエラーになったときの対応メモ - Qiita
$ git fetch
$ git merge --allow-unrelated-histories origin/master
これでリモートの内容が取り込めましたので、あとは発生したコンフリクトを解消するだけです。
$ git status
On branch master
Your branch and 'origin/master' have diverged,
and have 1 and 1 different commits each, respectively.
  (use "git pull" to merge the remote branch into yours)

You have unmerged paths.
  (fix conflicts and run "git commit")
  (use "git merge --abort" to abort the merge)

Unmerged paths:
  (use "git add <file>..." to mark resolution)

    both added:      .gitignore
    both added:      README.md
checkout --oursでコンフリクト解消
エディタで不要な箇所を削除してもいいのですが、以下のコマンドを使えば一発でローカル側を優先できます。
$ git checkout --ours README.md
$ git checkout --ours .gitignore
解消したコンフリクトをcommit & push
$ git add .
$ git commit # コミットコメントを入れて`:wq`
これで無事pushができるようになりました。
$ git push -u origin master
プロジェクトフォルダー内でNode.jsのバージョンを固定
nodenvでノードのバージョンをプロジェクトフォルダー内で固定しておきます。
$nodenv local 10.13.0
Storybookのインストール
Storybook公式のスタートガイドである、 Starter Guide Vue に記載の方法はどうやらVue CLI 3に対応してないようです。
そこで vue-cli-plugin-storybook というプラグインを使います。
vue-cli-plugin-storybook - npm
プラグインを追加する前に、一度commitしておきましょう。
$ git add .
$ git commit
公式サイトのWARNINGに記載があるように、vue add を実行すると既存のファイルが変更されるからです。
WARNING
It is recommended to commit your project's current state before running vue add, since the command will invoke the plugin's file generator and potentially make changes to your existing files.
Quote source: Plugins and Presets | Vue CLI 3
vue-cli-plugin-storybookを追加
vue addコマンドでvue-cli-plugin-storybook を追加します。
$ vue add storybook
vue addを使う際は、package名のvue-cli-plugin-の部分を省略して書くことができます。
Without the @vue prefix, the command will resolve to an unscoped package instead. For example, to install the 3rd party plugin vue-cli-plugin-apollo:
# installs and invokes vue-cli-plugin-apollo
vue add apollo`
Quote source: Plugins and Presets | Vue CLI 3
https://github.com/vuejs/vue-cli/issues/1244
Storybookのビルド
下記のコマンドでStorybookがビルドできます。
$ npm run serve:storybook
warningがいくつか出ますがCompileには成功します。
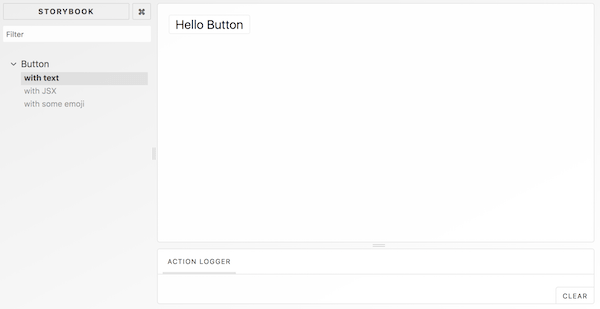
コンソールの最後に記載されたURL(http://localhost:6006/など)をブラウザで開くと、
サンプルのボタンがStorybookに掲載されています。

ESLint + Prettierの自動整形の設定をする[2018.11.7追記]
初期設定では、ESLintとPrettierの設定がちぐはぐで
「Prettierが自動整形でセミコロンを勝手につけた結果、ESLintではセミコロンでwarnを出す設定になってるためwarnが大量に出る」
なんてことが起こってます。
先の大量のwarnがそのためです。
Prettierの設定をESLintの設定に合わせて変更します。
- .eslintrc.js
   rules: {
    "no-console": process.env.NODE_ENV === "production" ? "error" : "off",
    "no-debugger": process.env.NODE_ENV === "production" ? "error" : "off"
+    'prettier/prettier': [
+      'warn',
+      {
+        singleQuote: true,
+        semi: false,
+        trailingComma: 'none'
+      }
+    ]
   },
これで、整形がされてもwarnがでなくなりました。
参考:
これで、一通りのセットアップが完了しました。
次回は、Atomic Designの各コンポーネントを作成していきます。